Sandbox
Sandbox
We offer a regulatory Sandbox that mirrors our production Open Banking APIs.
The Sandbox provides a complete simulation of our Open Banking APIs, enabling comprehensive testing without accessing any real customer data. Developers can interact with the Sandbox environment using their own self-signed certificates, with no need for prior onboarding approval.
Sandbox Connectivity Details
Sandbox Authorisation Server URLs
- OIDC Well Known endpoint: https://auth1.api-oba.dev.salt.bank/.well-known/openid-configuration
- Base URL: https://auth1.api-oba.dev.salt.bank
- Authorisation URL: https://auth1.api-oba.dev.salt.bank
Sandbox Strict Security Profile
Salt Bank support the following OpenID Provider Metadata for Strict Profile:
- Response Types: code
- PKCE code challenge methods supported: ["S256"],
- Request Object Signing Algorithms: PS256
- Token Endpoint Auth Signing Algorithms: PS256
- Token Endpoint Auth Methods: private_key_jwt
- ID Token Signing Algorithm: PS256
Sandbox Permissive Security Profile
Optionally, the Sandbox environment supports a permissive security profile.
This mode relaxes certain security checks related to token generation and authorization redirects, making it easier to test early-stage implementations.
If needed during onboarding, you may request that the permissive profile be enabled for your Sandbox access.
Sandbox Resource Server URLs
- Account Information Services API: https://rs1.api-oba.salt.bank/v1
Step by Step guide to connect to the Sandbox
Step 1: Contact Salt Bank Open Banking Support
To begin onboarding to Salt Bank’s Open Banking Sandbox, please email our support team at mailto:openbanking@salt.bank, providing the following details about your TPP proposition:
Environment (Sandbox and/or Production): Specify whether you require access to the Sandbox environment for testing, the Production environment for live transactions, or both.
Organisation Name: Provide the registered legal name of your organization, exactly as it appears under your PSD2 license with your national competent authority.
Copy of eIDAS QWAC Certificate and Chain: Attach your Qualified Website Authentication Certificate (QWAC) and its full certificate chain, issued under the eIDAS regulation. This is required to establish secure and trusted connections.
JWKS URL: Share the URL of your JSON Web Key Set (JWKS) endpoint. This is used to validate the signatures of tokens generated by your systems.
Roles (AIS, PIS, CBPII): Indicate which Open Banking roles your organization is authorized for:
AIS: Account Information Service
PIS: Payment Initiation Service
CBPII: Card-Based Payment Instrument Issuer
Redirect URI(s): Provide one or more redirect URIs to be used during OAuth2/OpenID Connect flows. These URIs must exactly match those registered in your systems.
Step 2: Receive Postman Environment File
Once your onboarding request is reviewed, Salt Bank will issue a Client Profile JSON file. This file contains environment-specific configuration details and can be imported directly into Postman.
Step 3: Download Postman Software
Download and install Postman from the official site:
Step 4: Download Postman Collection
Visit the Help/Resources section of this Developer Portal to download the latest Salt Bank Open Banking Postman Collection.
Step 5: Import Environment File and Collection into Postman
Open Postman and import both:
- The Client Profile JSON file as an Environment
- The Postman Collection JSON file
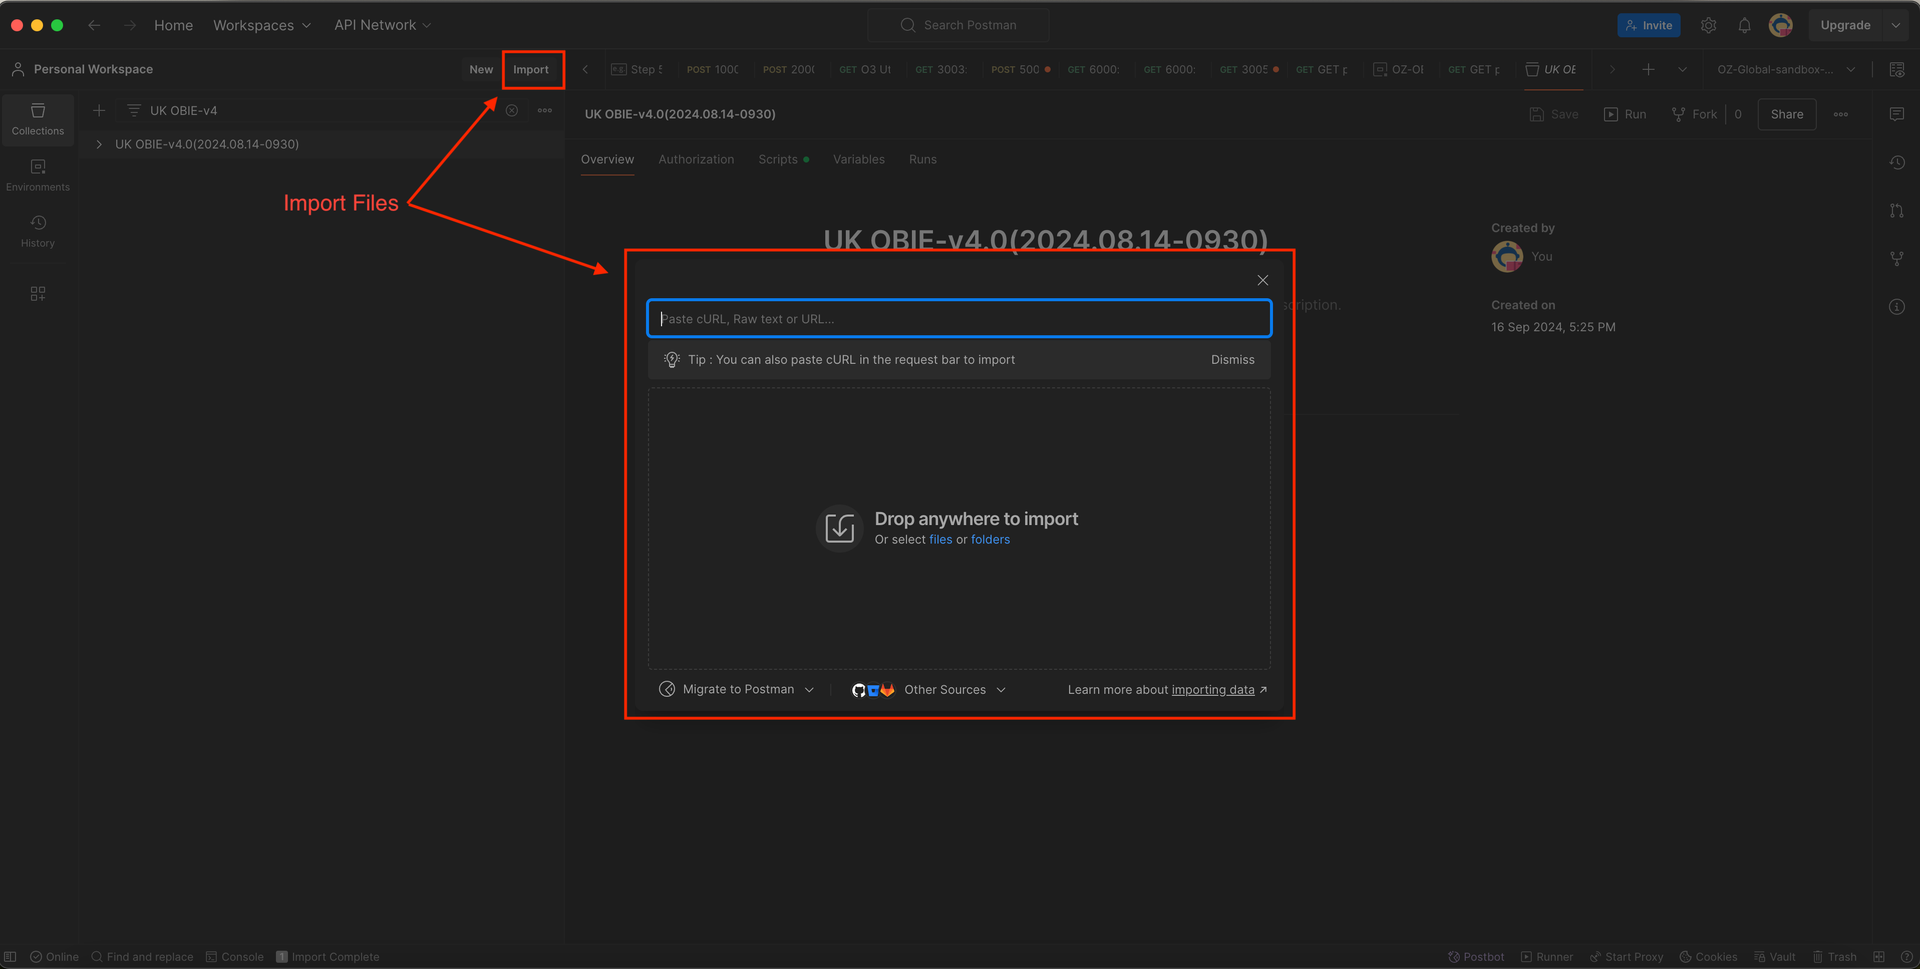
Importing Files into the Postman
Step 6: Verify Import
Ensure the environment and collection are both loaded successfully in Postman.
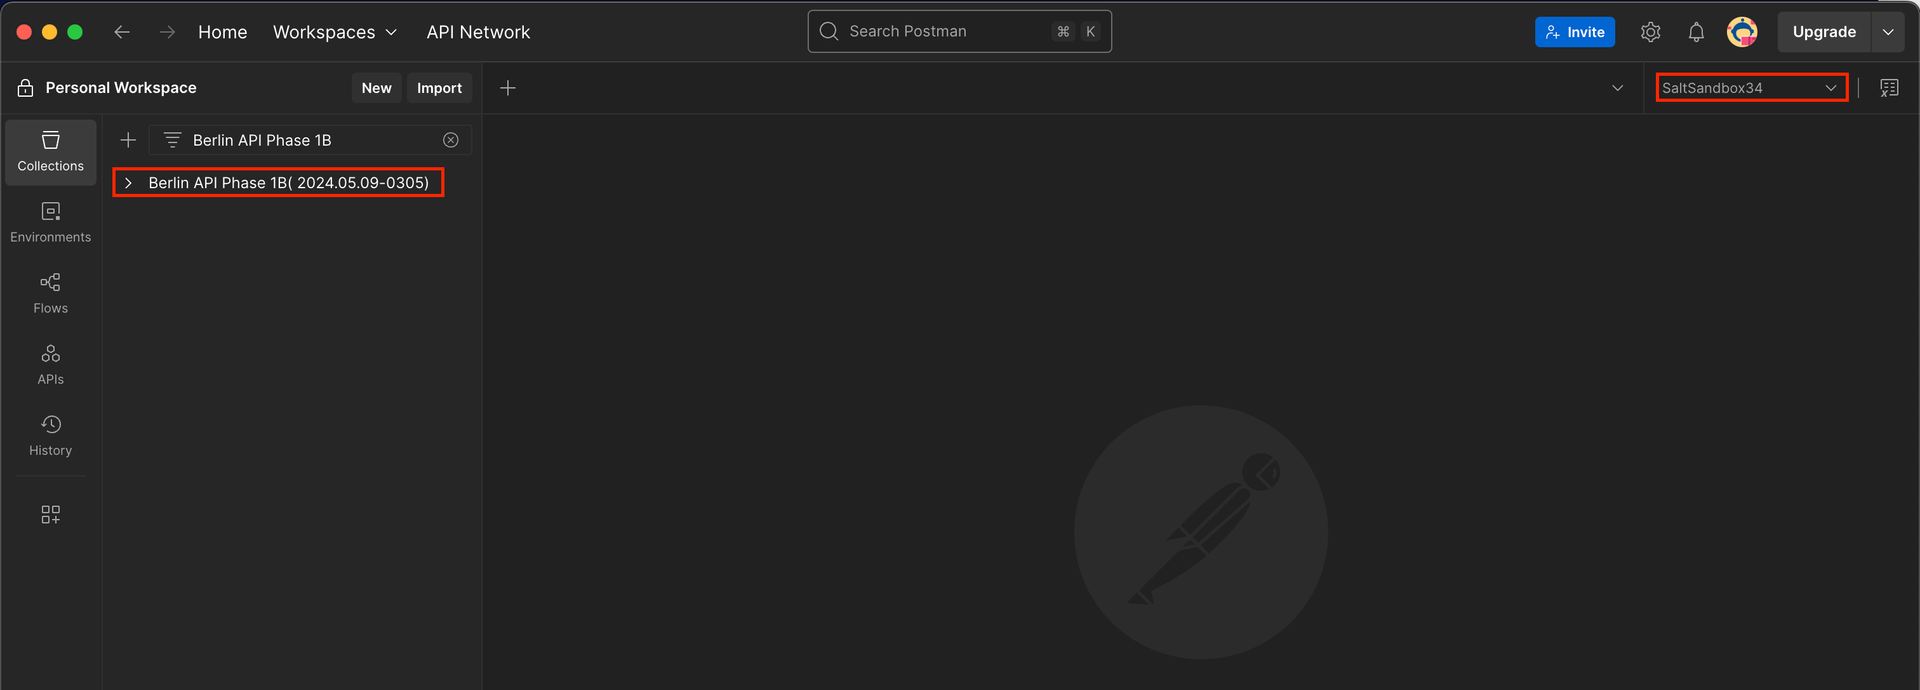
Checking Import Files
Step 7: Configure Certificates in Postman
In Postman, go to:
Settings → Certificates → Add Certificate
Add the following:
- Host: .api-oba.dev.salt.bank:
- CRT file: Transport certificate (your QWAC certificate)
- KEY file: Private key corresponding to the transport certificate
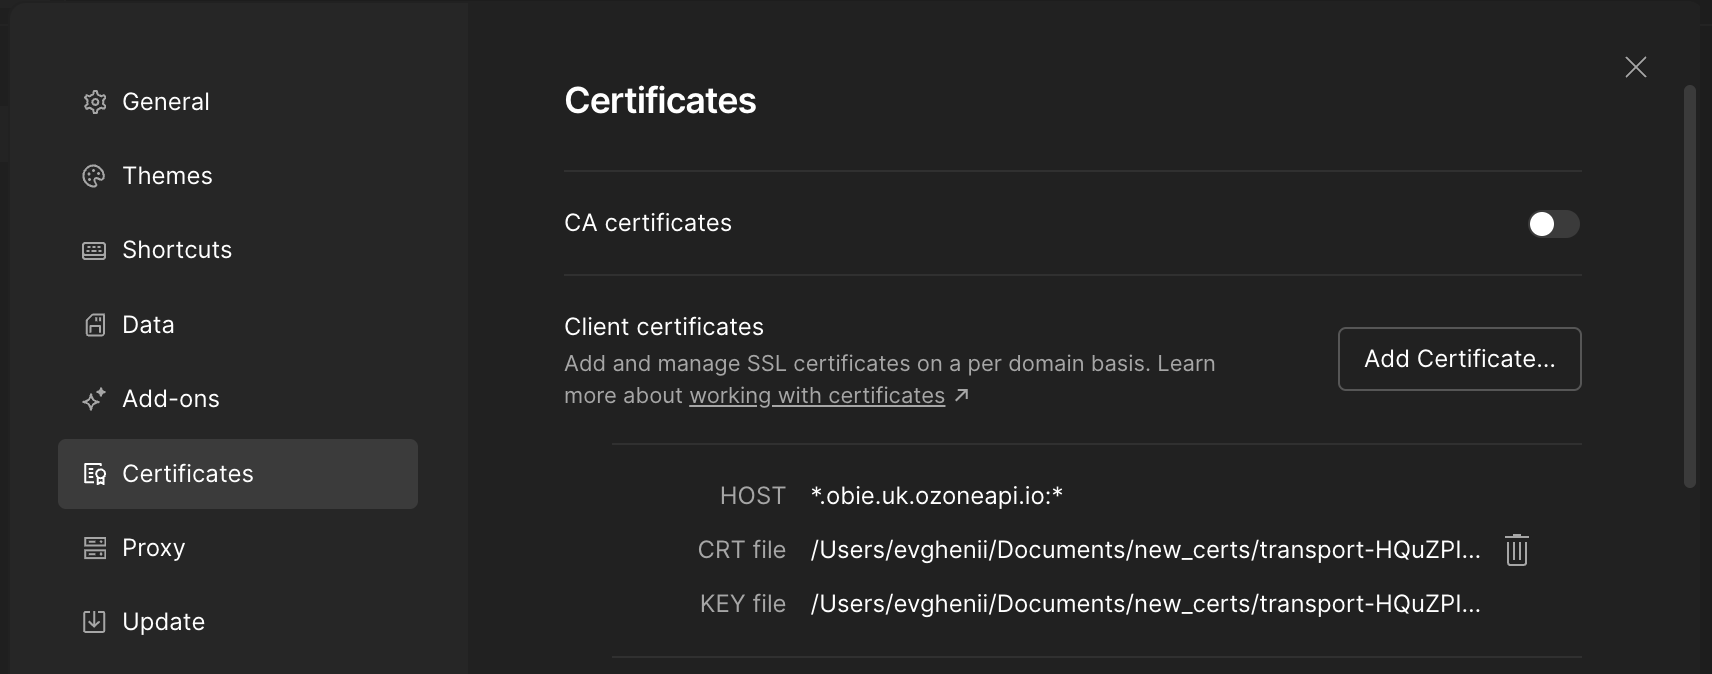
Configuring Certificates
Step 8: Disable SSL Certificate Verification (For Sandbox Only)
In Postman settings, set:
SSL Certificate Verification: OFF This is required for the Sandbox when using self-signed certificates.
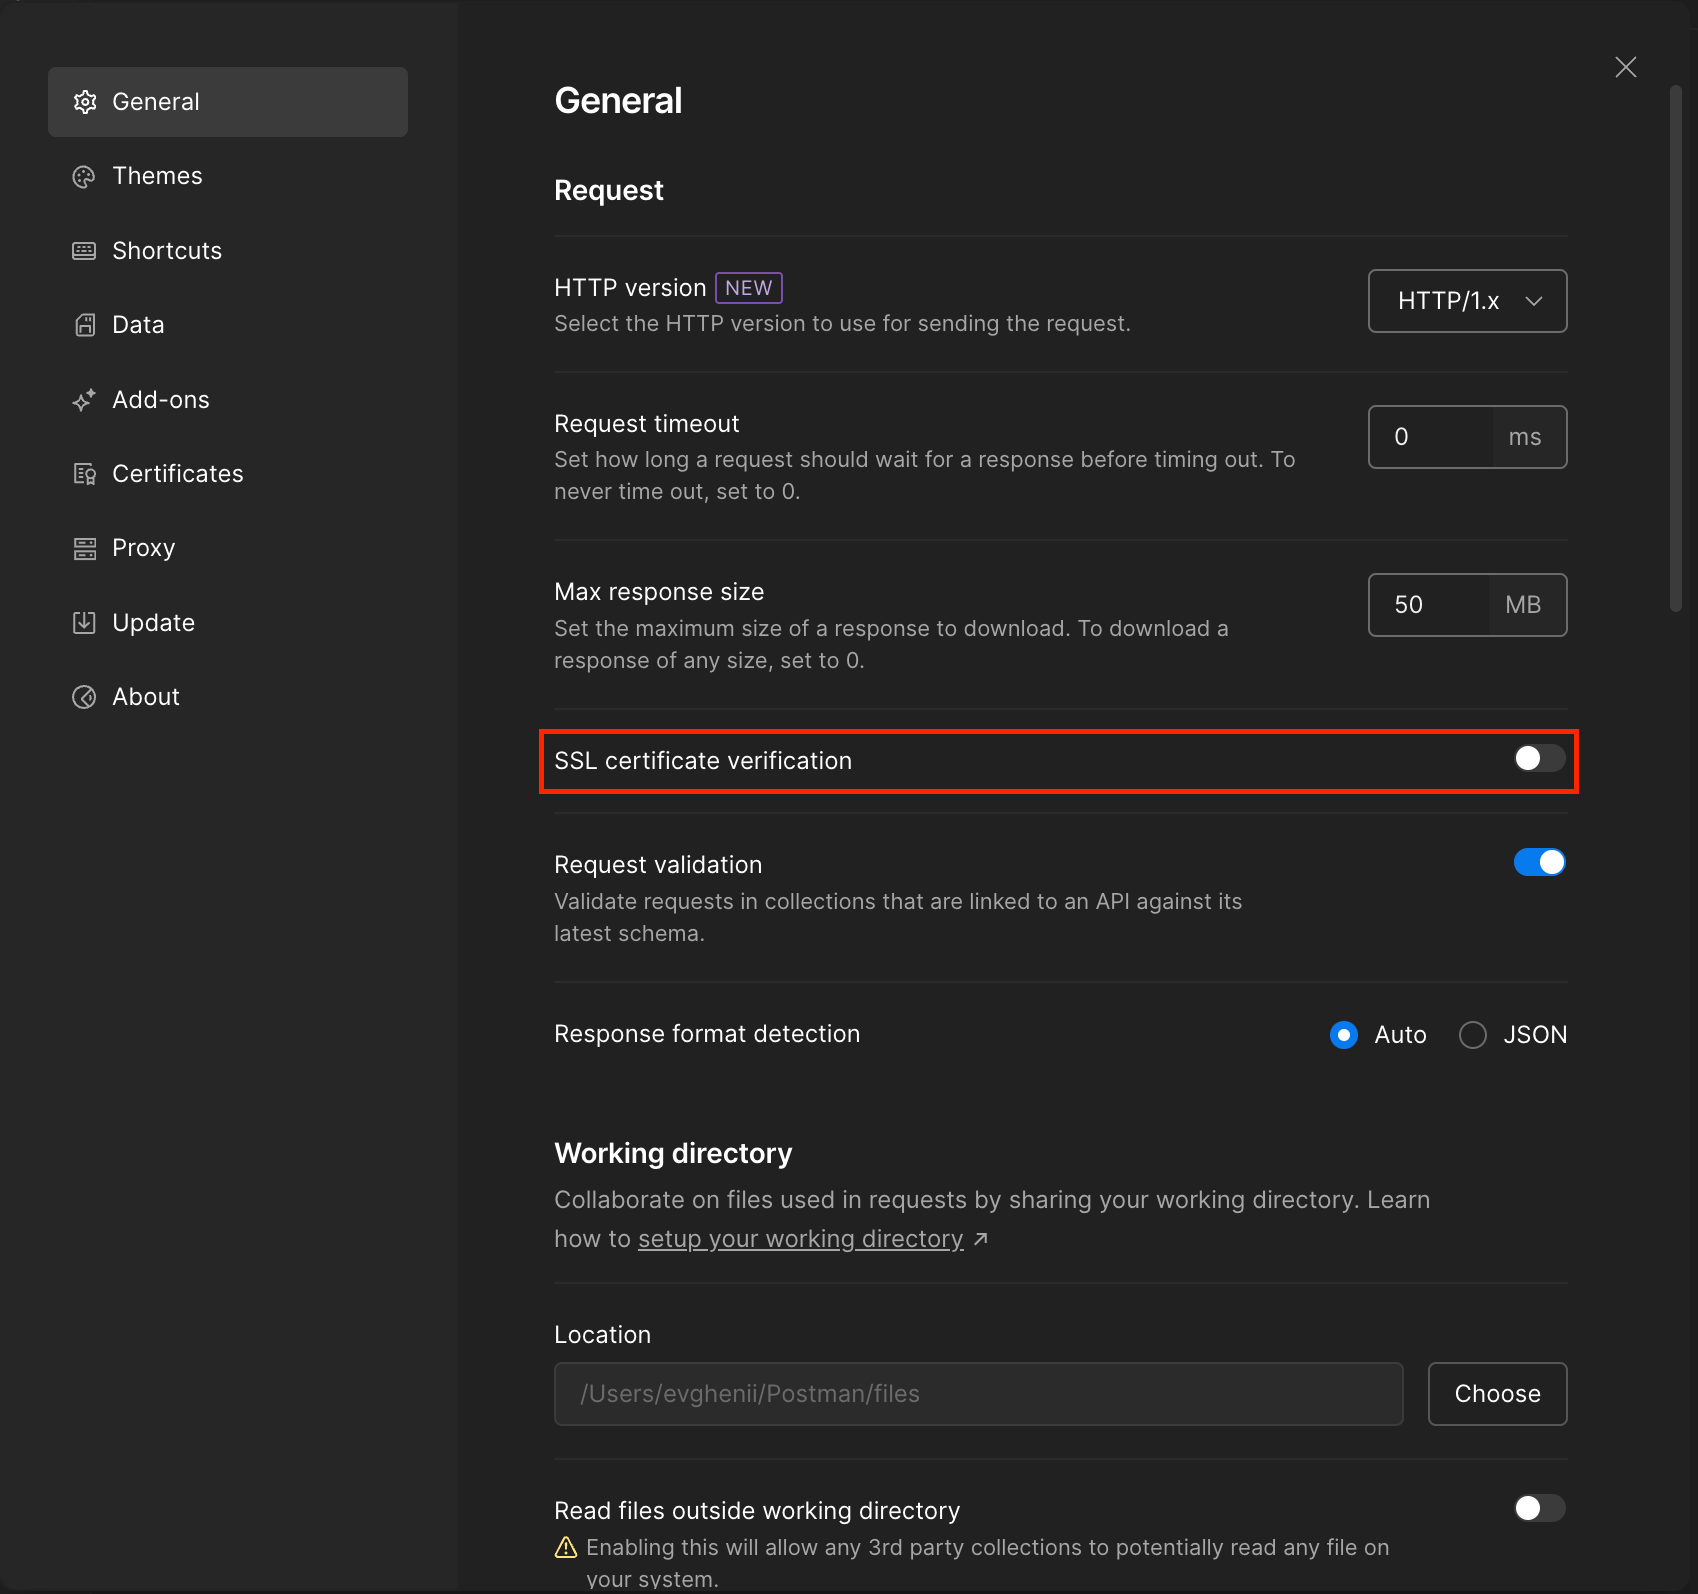
Disabling SSL Certificate Verification
Step 9: Test Account Information Flow
9.1 – Obtain Client Credentials Token Send a GET request to retrieve a token using client credentials.

Obtaining ccg token
9.2 – Create Account Access Consent Send a POST request to initiate consent creation.
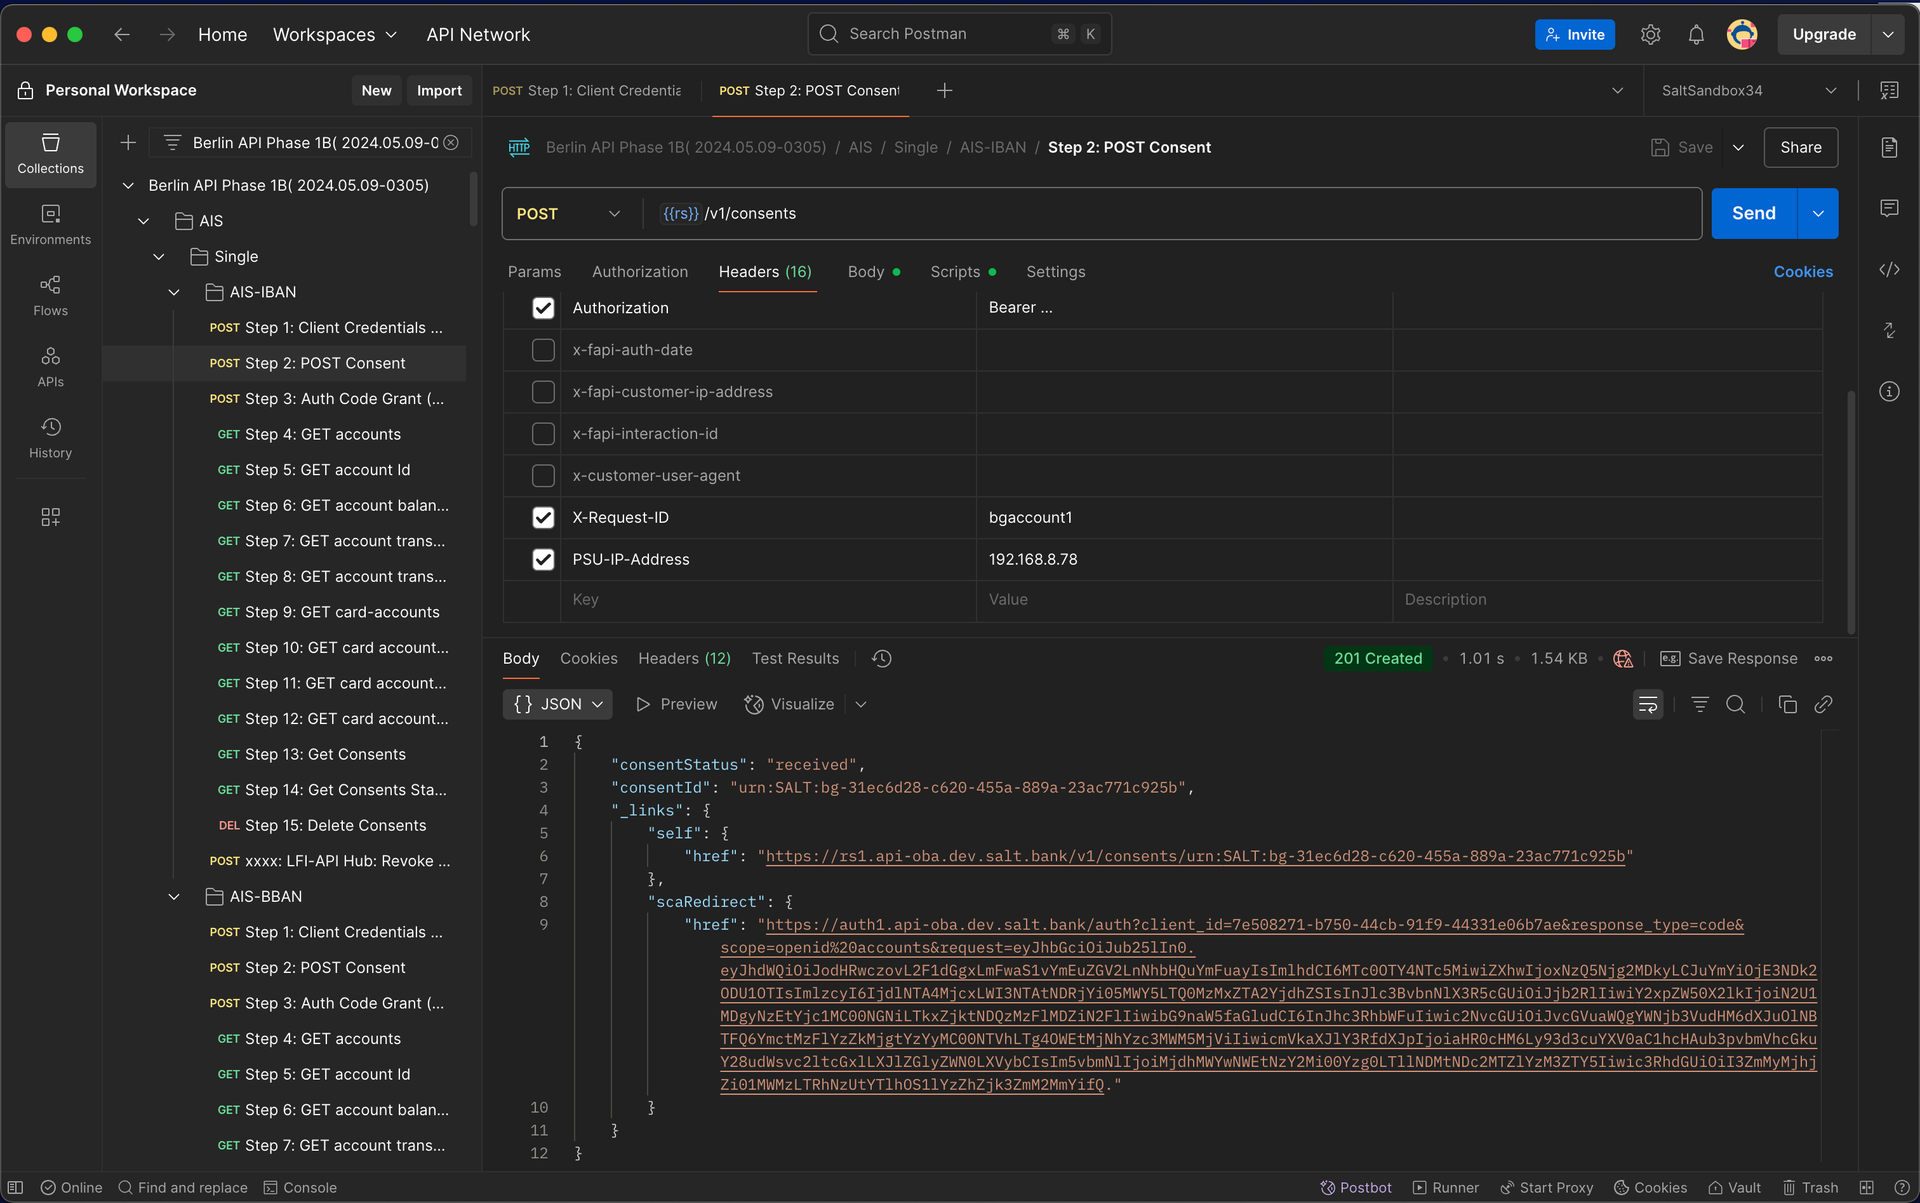
Setting Up Consent
9.3 – Follow Authorization URL returned in Consent Response Use Postman to generate the PSU consent URL. Open this URL in your browser to simulate the user (PSU) authorizing consent.
9.4 – Authenticate Test User Use one of the following Sandbox test accounts to authenticate:
| user | password |
|---|---|
| mits | mits. |
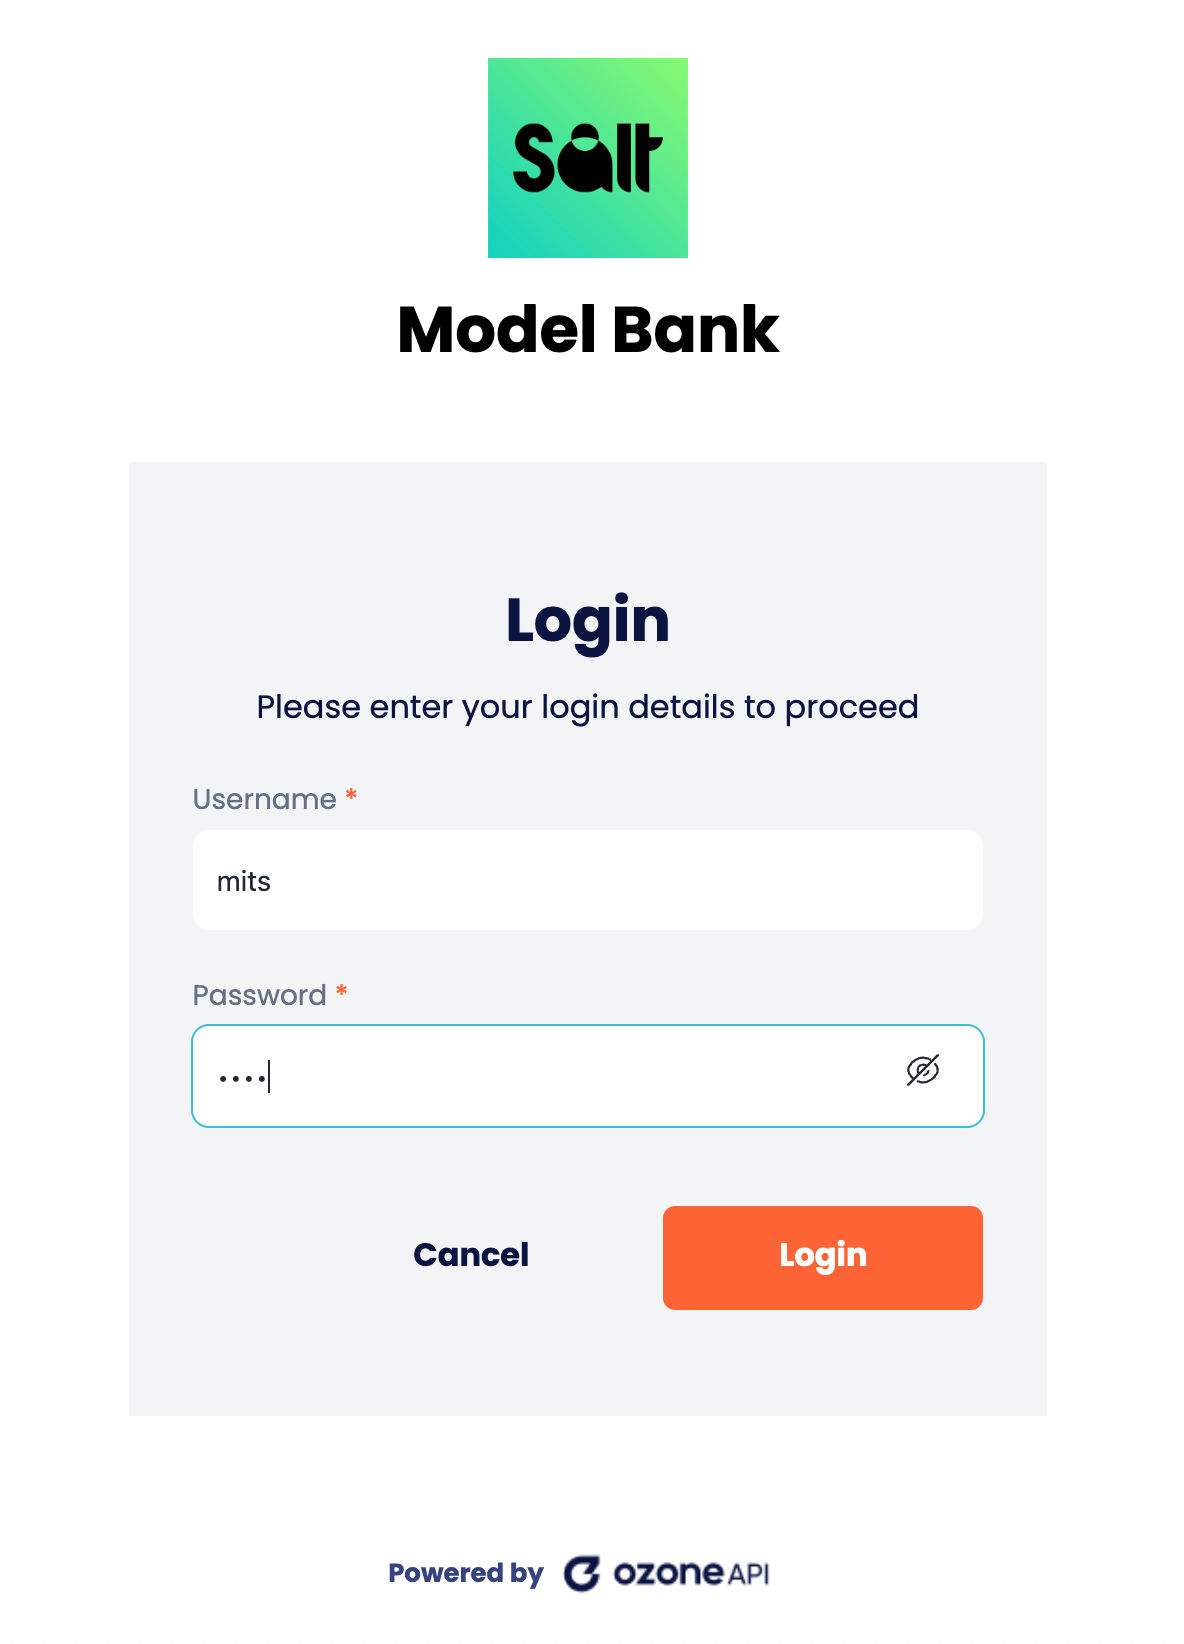
Authenticating User
9.5 – Consent Confirmation After the user needs to select account(s) and confirm consent.
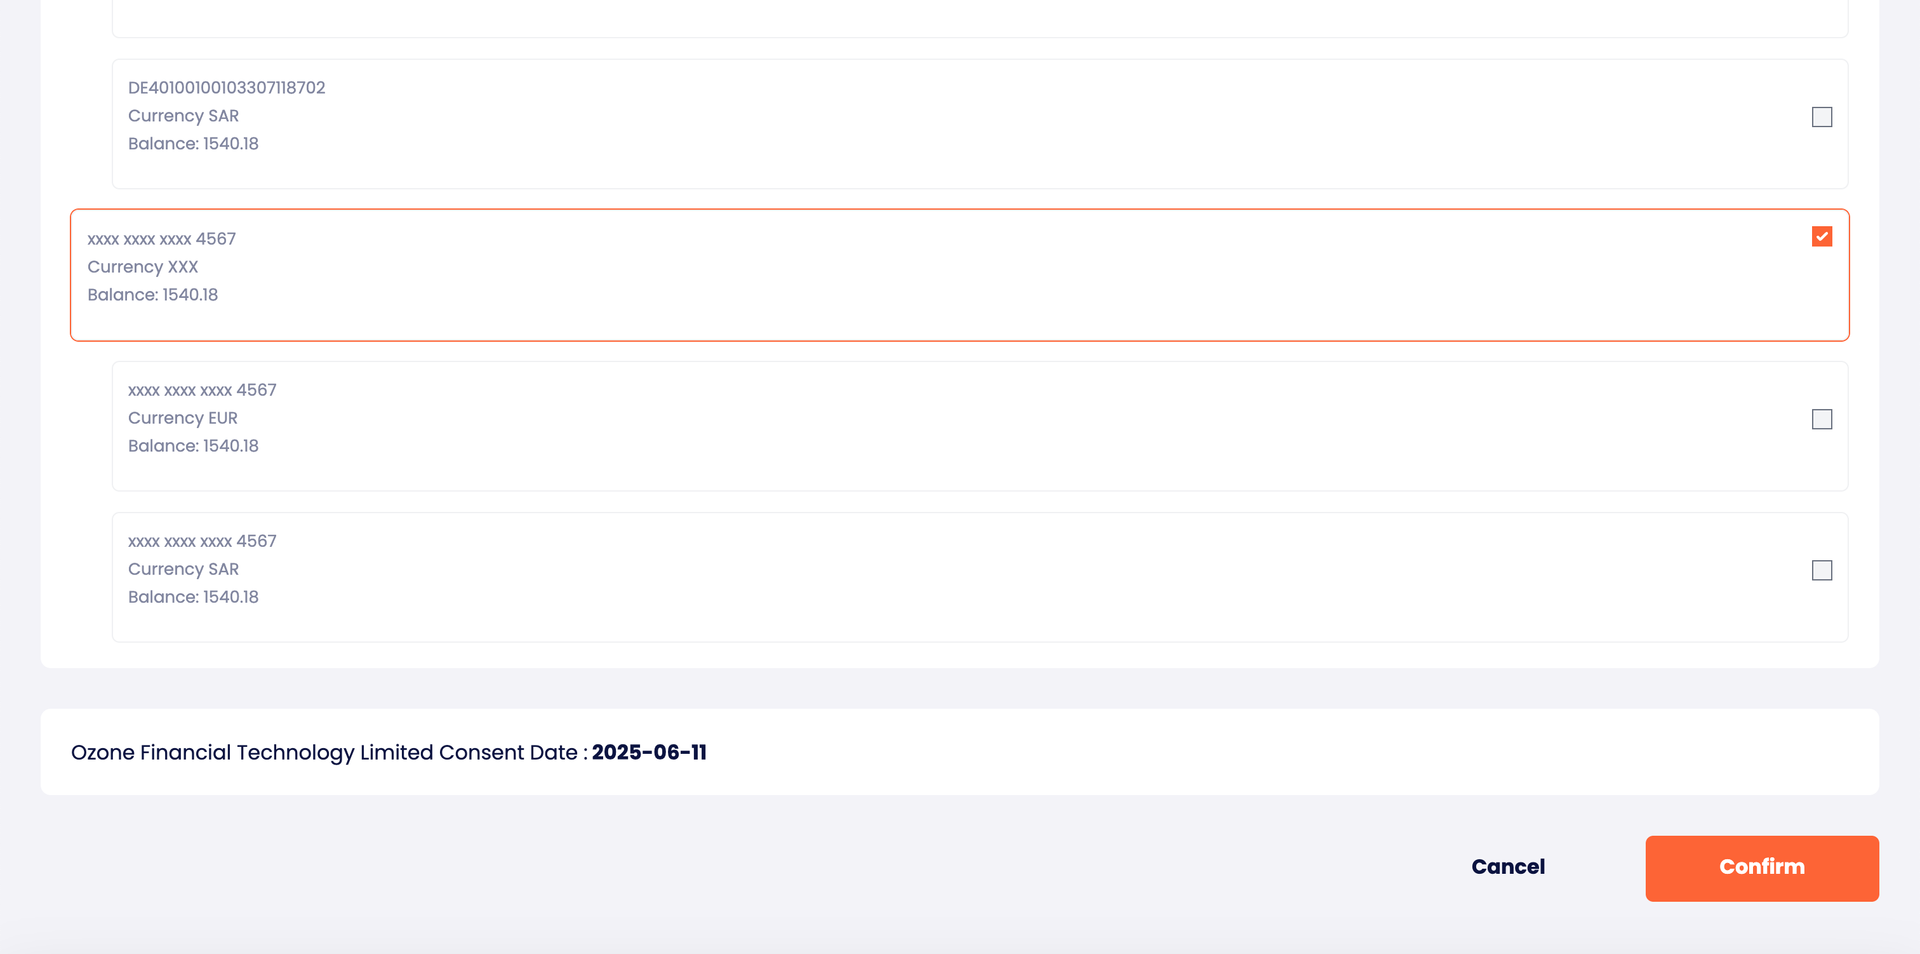
Selecting accounts to share
9.6 – Redirect & Authorization Code Extract the auth code from the redirect URL.

9.7 – Exchange Auth Code for Access Token Use the authorization code to request an access token.
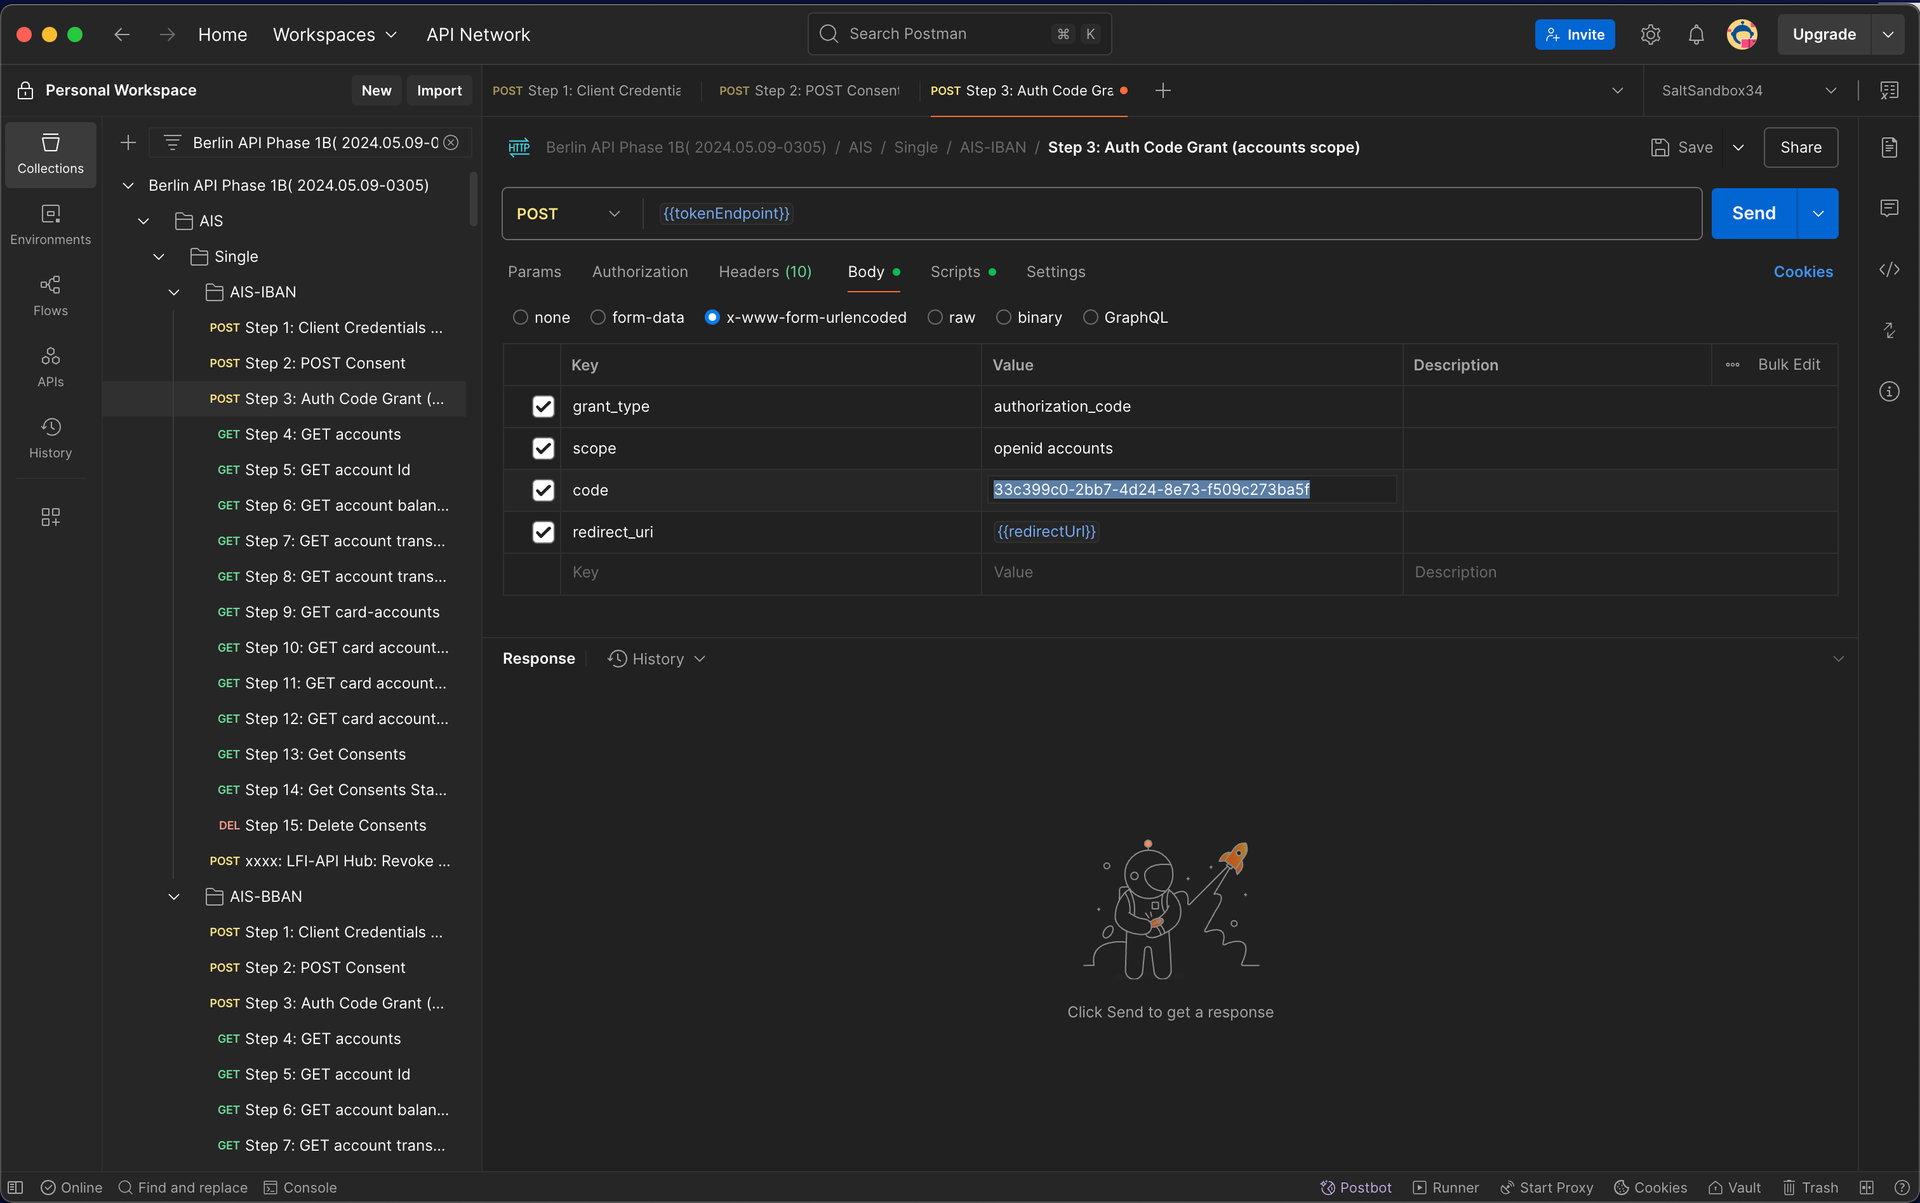
Exchanging code for access token
9.8 – Retrieve Account Data Send a request to fetch account information using the access token.
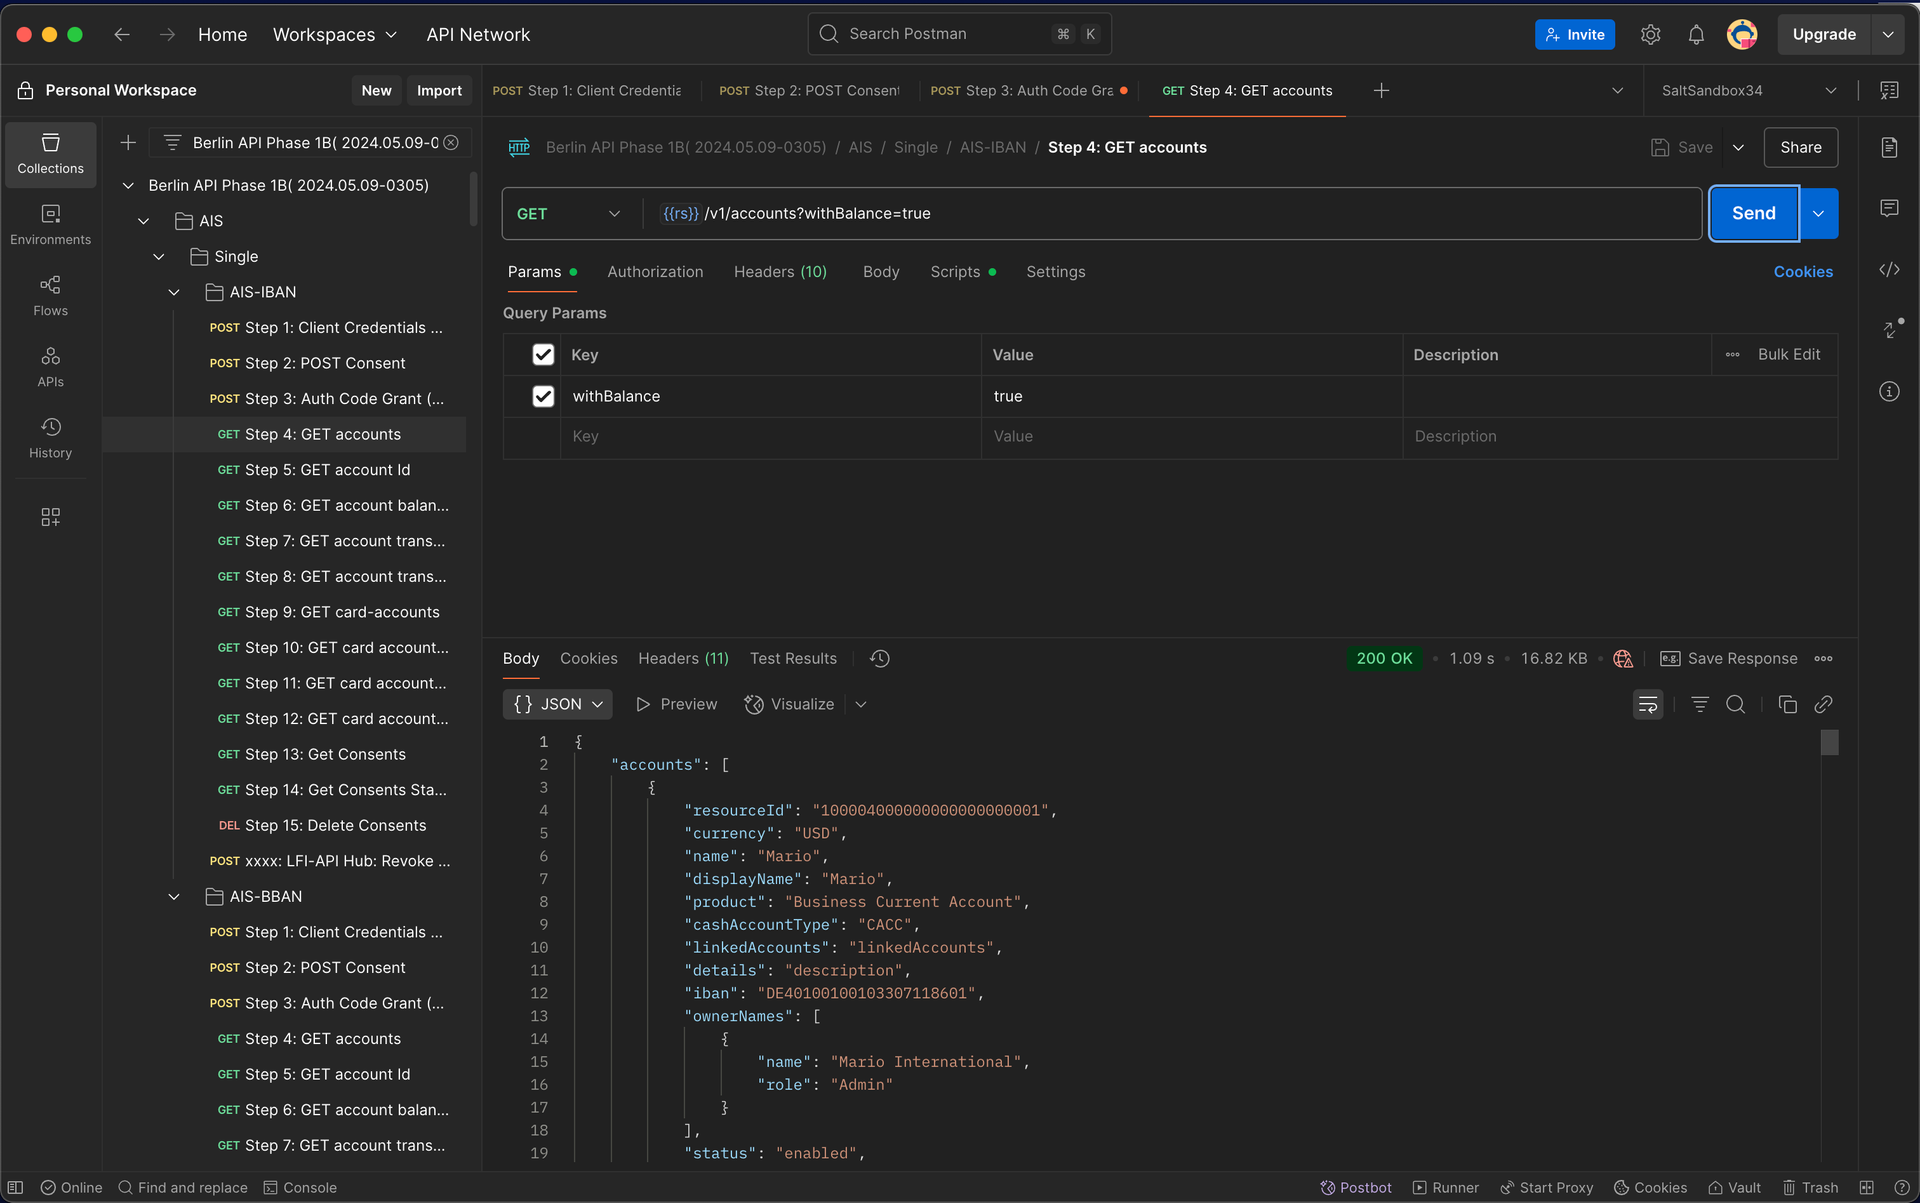
Retrieving accounts data